
Tired of peanut butter cookies that spread too thin, turn out crumbly, or lack that perfect balance of chewy centers and crispy edges? You’re not alone. Most home bakers struggle with achieving bakery-quality peanut butter cookies because they overlook crucial techniques that make all the difference.
This Peanut Butter Cookies recipe delivers what every cookie lover craves: rich peanut butter flavor, a tender-chewy texture, and those iconic crisscross marks that signal homemade perfection. Whether you’re baking for a holiday party, school event, or simply satisfying a sweet tooth, these cookies come together with pantry staples and foolproof methods.
As someone who’s tested dozens of peanut butter cookie variations over the years, I’ve refined this recipe to eliminate guesswork. You’ll discover exactly why room-temperature ingredients matter, how chilling time affects texture, and the science behind achieving that signature crackled top.
“The secret to extraordinary cookies lies not in exotic ingredients, but in understanding the fundamentals.”
In this guide, you’ll learn the 7 simple ways to skyrocket your peanut butter cookie game, from selecting the right peanut butter to mastering baking temperatures. We’ll cover ingredient selection, mixing techniques, troubleshooting tips, flavor variations, and answers to the most common baking questions.
Peanut Butter Cookies Recipe
Table of Contents
Recipe Overview
| Detail | Information |
|---|---|
| Prep Time | 15 minutes |
| Cook Time | 12 minutes |
| Total Time | 27 minutes (plus chilling) |
| Servings | 24 cookies |
| Course | Dessert |
| Cuisine | American |
| Oven Temperature | 350°F (175°C) |
| Calories per Cookie | 165 kcal |
Why This Peanut Butter Cookies Recipe Works
“Simplicity paired with precision creates unforgettable flavor.”
This recipe succeeds where others fail because it focuses on three critical elements: flavor, texture, and convenience.
- Uses affordable, pantry-friendly ingredients – No specialty items required; just peanut butter, sugar, eggs, and basic baking staples you likely already have.
- Ready in under 30 minutes – Quick prep means you can satisfy cookie cravings without spending hours in the kitchen.
- Perfect balance of chewy and crispy – The specific ratio of brown sugar to white sugar creates cookies with soft centers and delightfully crisp edges.
- Foolproof technique – Step-by-step instructions eliminate common mistakes like over-spreading or dry, crumbly cookies.
- Versatile base recipe – Easily customize with chocolate chips, chopped peanuts, or other mix-ins to suit any preference.
Choosing the Right Ingredients
Getting exceptional peanut butter cookies starts with selecting quality ingredients. Each component plays a specific role in texture and flavor.
Best Peanut Butter for Baking
Not all peanut butter is created equal when it comes to cookies. Choose creamy, conventional peanut butter like Jif or Skippy rather than natural varieties. Natural peanut butter contains more oil separation and less stabilization, which can cause cookies to spread excessively and develop an oily texture.
Avoid reduced-fat peanut butter, as fat is essential for tender cookies. The extra sugar and stabilizers in regular peanut butter actually help cookies maintain their shape and create that characteristic crackled top.
Sugar Selection Matters
This recipe calls for both brown sugar and granulated white sugar. Brown sugar contains molasses, which adds moisture and creates chewiness, while white sugar promotes spreading and crispness. The 50-50 combination gives you the best of both textures.
Butter Temperature
Room temperature butter (around 65-70°F) is crucial. It should be soft enough to leave a slight indent when pressed but still hold its shape. Butter that’s too warm will cause excessive spreading; butter that’s too cold won’t cream properly with sugar.
Egg Quality
Use large eggs at room temperature. Cold eggs can cause butter to seize up and create an uneven dough texture. Let eggs sit on the counter for 30 minutes before baking, or place them in warm water for 5 minutes.
Ingredients & Prep
Complete Ingredients List
| Ingredient | Quantity |
|---|---|
| All-purpose flour | 1¼ cups (156g) |
| Baking soda | 1 teaspoon |
| Salt | ½ teaspoon |
| Unsalted butter, softened | ½ cup (113g) |
| Creamy peanut butter | ½ cup (130g) |
| Granulated white sugar | ½ cup (100g) |
| Light brown sugar, packed | ½ cup (100g) |
| Large egg | 1 |
| Vanilla extract | 1 teaspoon |
| Granulated sugar for rolling | ¼ cup (50g) |
Prep Essentials
Measuring Accuracy: Spoon flour into measuring cups and level off with a knife. Don’t scoop directly from the bag, as this compacts flour and adds too much, resulting in dry cookies.
Softening Butter: Plan ahead by leaving butter on the counter for 30-45 minutes. If you forgot, cut butter into small pieces to speed softening, but never microwave it to liquid.
Mise en Place: Measure all ingredients before starting. Have your flour mixture ready in one bowl and wet ingredients in another for smooth mixing.
Step-by-Step Cooking Instructions
Step 1: Prepare Your Workspace
| Step | Time | Key Point |
|---|---|---|
| Preheat oven | 5 minutes | 350°F (175°C) |
| Line baking sheets | 2 minutes | Parchment paper prevents sticking |
| Arrange racks | 1 minute | Position in center for even heat |
Preheat your oven to 350°F and line two baking sheets with parchment paper. Never skip the parchment—it prevents cookies from sticking and promotes even browning on the bottom.
Step 2: Mix Dry Ingredients
In a medium bowl, whisk together flour, baking soda, and salt until fully combined. Set aside. This ensures even distribution of leavening agents, which is critical for uniform texture.
Step 3: Cream Butter and Sugars
In a large bowl using an electric mixer, beat softened butter, peanut butter, granulated sugar, and brown sugar on medium speed for 2-3 minutes. The mixture should become light and fluffy with a pale color. This process incorporates air, which creates lighter cookies.
Don’t rush this step. Proper creaming makes a significant difference in final texture.
Step 4: Add Egg and Vanilla
Beat in the egg and vanilla extract until fully incorporated, about 30 seconds. Scrape down the sides of the bowl to ensure even mixing.
Step 5: Combine Wet and Dry
Add the flour mixture to the wet ingredients and mix on low speed just until no flour streaks remain. Overmixing develops gluten, which makes cookies tough rather than tender. Stop mixing the moment you see a uniform dough.
Step 6: Shape and Mark Cookies
Scoop dough into 1½-tablespoon portions (about 20g each) and roll into balls. Roll each ball in granulated sugar, then place on prepared baking sheets 2 inches apart.
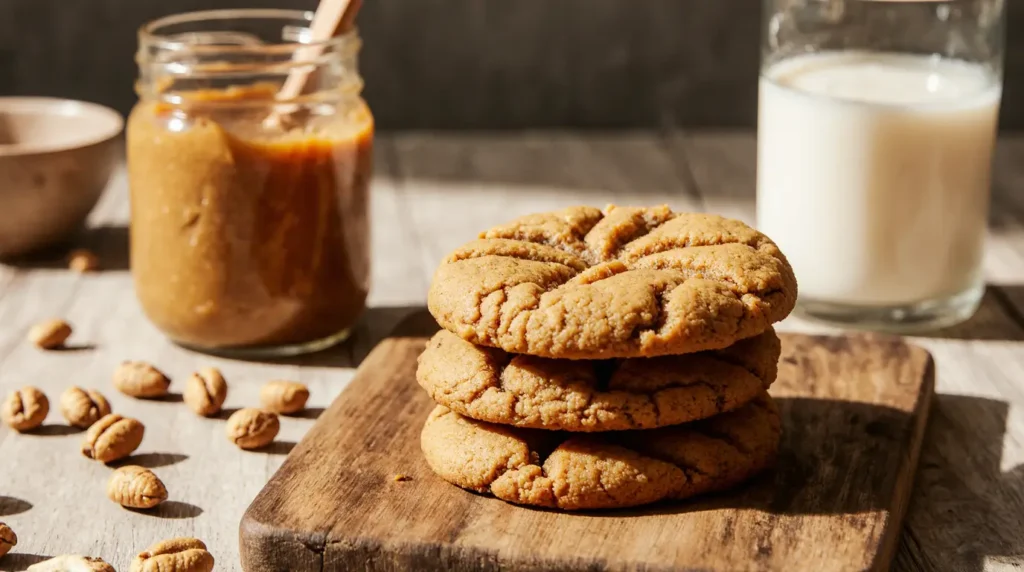
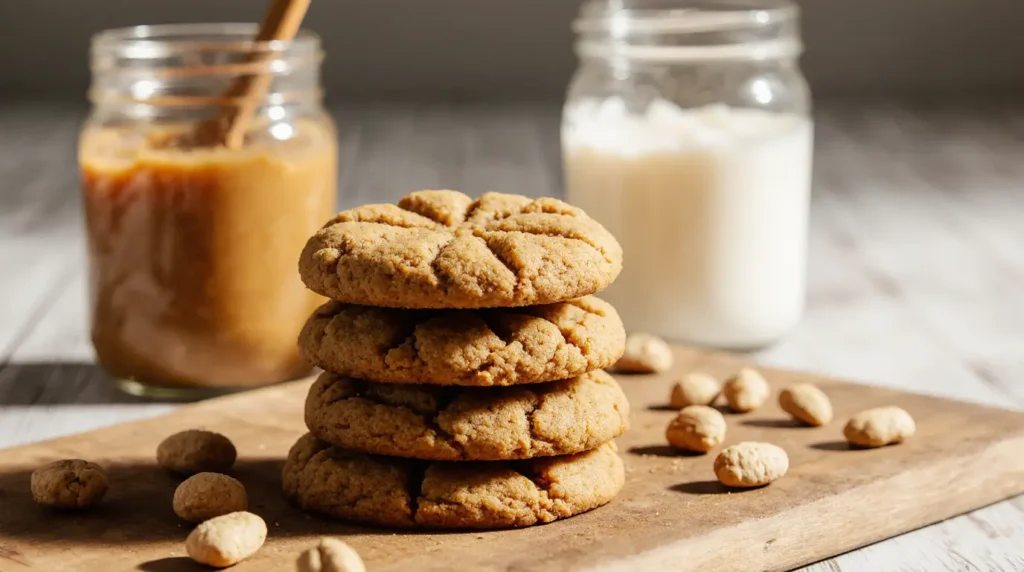
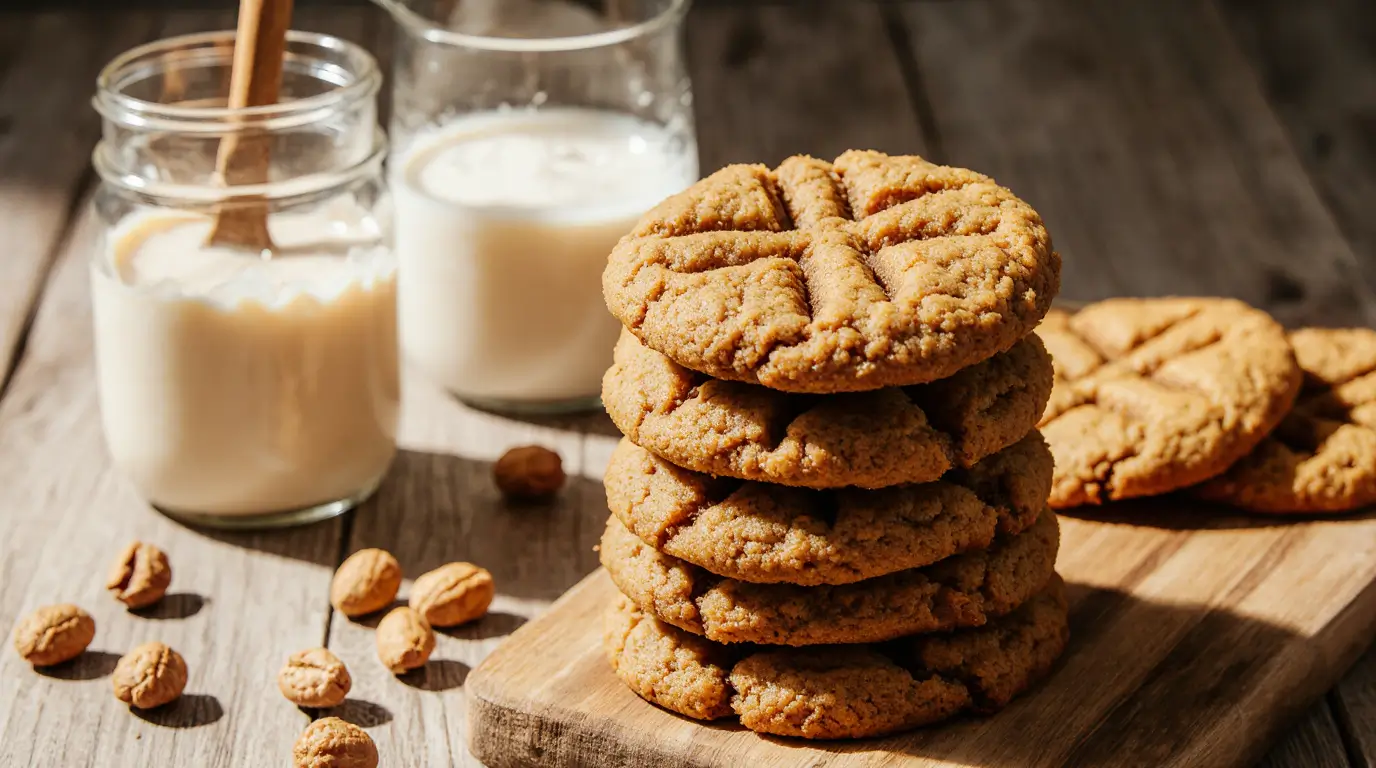
Use a fork to create the signature crisscross pattern by pressing down gently in one direction, then rotating 90 degrees and pressing again. This isn’t just decorative—it helps cookies bake evenly by flattening the dough slightly.
Step 7: Bake to Perfection
Bake for 10-12 minutes until edges are set and lightly golden. Centers will look slightly underdone—this is correct. Cookies continue baking on the hot pan after removal from the oven.
Let cookies cool on the baking sheet for 5 minutes before transferring to a wire rack. This resting period allows them to firm up without breaking.
Pro Tips for Perfect Peanut Butter Cookies
Avoiding Common Mistakes
Don’t overbake: Peanut butter cookies dry out quickly. Remove them when centers still look soft and slightly glossy. They’ll firm up as they cool but remain tender inside.
Maintain consistent size: Use a cookie scoop for uniform portions. This ensures all cookies bake at the same rate, preventing some from burning while others stay underdone.
Space cookies properly: Leave 2 inches between dough balls. Peanut butter cookies spread moderately, and proper spacing prevents them from merging into one giant cookie sheet.
Tool Recommendations
A cookie scoop (1½-tablespoon size) creates perfectly round, evenly sized cookies every time. It’s a worthwhile investment for consistent results.
Parchment paper is non-negotiable. Silicone mats work too, but parchment provides the ideal level of browning on cookie bottoms.
An oven thermometer helps verify accurate temperature. Many ovens run 25°F hotter or cooler than the dial indicates, which significantly affects baking times.
Storage & Reheating
| Storage Method | Duration | Instructions |
|---|---|---|
| Room temperature | 5-7 days | Store in airtight container with parchment between layers |
| Refrigerated | 2 weeks | Same container method; bring to room temp before serving |
| Frozen (baked) | 3 months | Wrap in plastic, then foil; thaw at room temperature |
| Frozen (dough) | 3 months | Scoop balls, freeze on tray, then bag; bake from frozen, add 2 minutes |
To refresh cookies, warm in a 300°F oven for 3-5 minutes. This restores that fresh-baked texture and aroma.
Flavor Variations
Chocolate Lover’s Version
Fold in ¾ cup chocolate chips after mixing the dough. Semi-sweet, milk chocolate, or even dark chocolate chunks all pair beautifully with peanut butter. For extra decadence, drizzle cooled cookies with melted chocolate.
Crunchy Peanut Butter Cookies
Substitute crunchy peanut butter for creamy, or add ½ cup chopped roasted peanuts to the dough. This creates additional texture and intensifies the peanut flavor.
Keto-Friendly Adaptation
Replace all-purpose flour with almond flour (use 1½ cups). Substitute both sugars with granulated erythritol or monk fruit sweetener in equal amounts. Add an extra ¼ teaspoon xanthan gum to help bind. Bake at 325°F for 13-15 minutes.
Global Flavors
Tahini Twist: Replace half the peanut butter with tahini for a sophisticated, slightly bitter note that complements the sweetness.
Cardamom Spice: Add ½ teaspoon ground cardamom to the dough for an aromatic Middle Eastern flavor profile.
Matcha Fusion: Mix 1 tablespoon matcha powder into the flour mixture for earthy green tea notes that pair surprisingly well with peanut butter.
Serving Suggestions
Peanut butter cookies shine on their own, but thoughtful pairings elevate the experience.
Beverage Pairings: Serve with cold milk (classic for a reason), hot coffee, or chai tea. For adults, try with bourbon or a creamy Irish coffee.
Ice Cream Sandwiches: Sandwich vanilla, chocolate, or salted caramel ice cream between two cookies for an impressive dessert. Freeze assembled sandwiches wrapped individually for a ready-made treat.
Cookie Platters: Pair with chocolate chip cookies and oatmeal raisin for variety. The different textures and flavors complement each other beautifully on a dessert table.
Crumbled Topping: Crush cookies and sprinkle over ice cream, yogurt parfaits, or pudding for added crunch and flavor.
FAQs
Can I use natural peanut butter?
While possible, natural peanut butter often results in cookies that spread too much and have an oily texture. If you prefer natural, choose a well-stirred brand with minimal oil separation, and reduce butter to 6 tablespoons.
Why did my cookies turn out dry and crumbly?
This typically happens from overbaking or using too much flour. Remember, cookies continue baking after removal from the oven. Also ensure you’re measuring flour correctly by spooning it into cups rather than scooping.
Can I make the dough ahead of time?
Absolutely. Refrigerate dough for up to 3 days or freeze for 3 months. Cold dough actually produces thicker cookies with less spreading. Let refrigerated dough sit at room temperature for 10 minutes before scooping.
My cookies spread too much. What happened?
Common causes include butter that was too warm, dough that wasn’t chilled, or an oven temperature that’s too low. Ensure butter is properly softened (not melted), and verify oven temperature with a thermometer.
Are these cookies safe during pregnancy?
Yes, when baked properly. The eggs are fully cooked, eliminating any salmonella risk. Avoid eating raw cookie dough during pregnancy due to uncooked eggs and flour.
Can I make these gluten-free?
Yes. Use a 1:1 gluten-free flour blend designed for baking (like Bob’s Red Mill or King Arthur). Add ¼ teaspoon xanthan gum if your blend doesn’t include it. Results will be slightly more crumbly but still delicious.
Conclusion
“Every batch is an opportunity to create moments of pure, comforting joy.”
Mastering peanut butter cookies doesn’t require professional training or exotic ingredients—just attention to detail and these 7 simple techniques that skyrocket your results. From choosing the right peanut butter to understanding when cookies are perfectly baked, each step builds toward that ideal combination of crispy edges, chewy centers, and irresistible peanut butter flavor.
Fire up your oven and try this recipe tonight! There’s nothing quite like the aroma of fresh-baked peanut butter cookies filling your kitchen, and the satisfied smiles when people taste your creation.
Join thousands of home bakers who’ve discovered how easy it is to create bakery-quality peanut butter cookies. Once you master this foundation, experiment with the flavor variations to make this recipe your own signature treat.
Want more irresistible cookie recipes? Try our [Classic Chocolate Chip Cookie Guide] or [Ultimate Oatmeal Raisin Cookies] next. Your cookie jar deserves to stay full of homemade goodness!
Peanut Butter Cookies
Ingredients
- 1¼ cups 156g all-purpose flour
- 1 teaspoon baking soda
- ½ teaspoon salt
- ½ cup 113g unsalted butter, softened
- ½ cup 130g creamy peanut butter
- ½ cup 100g granulated white sugar
- ½ cup 100g light brown sugar, packed
- 1 large egg
- 1 teaspoon vanilla extract
- ¼ cup 50g granulated sugar for rolling
Instructions
- Preheat oven to 350°F (175°C) and line two baking sheets with parchment paper.
- Whisk together flour, baking soda, and salt in a medium bowl. Set aside.
- Beat softened butter, peanut butter, granulated sugar, and brown sugar in a large bowl with an electric mixer on medium speed for 2-3 minutes until light and fluffy.
- Add egg and vanilla extract to the butter mixture and beat for 30 seconds until fully incorporated. Scrape down sides of bowl.
- Add flour mixture to wet ingredients and mix on low speed just until no flour streaks remain. Do not overmix.
- Scoop dough into 1½-tablespoon portions and roll into balls.
- Roll each ball in granulated sugar to coat.
- Place dough balls on prepared baking sheets, spacing them 2 inches apart.
- Use a fork to press down gently in one direction, then rotate 90 degrees and press again to create a crisscross pattern.
- Bake for 10-12 minutes until edges are set and lightly golden. Centers will look slightly underdone.
- Let cookies cool on baking sheet for 5 minutes, then transfer to a wire rack to cool completely.
Notes
Refrigerate for up to 2 weeks
Freeze baked cookies for up to 3 months
Freeze raw dough balls for up to 3 months; bake from frozen, adding 2 minutes to bake time Pro Tips Use room temperature butter (65-70°F) for best results
Choose conventional creamy peanut butter (like Jif or Skippy), not natural varieties
Don’t overbake – remove when centers still look soft
Use a cookie scoop for uniform size
Cookies continue baking on hot pan after removal from oven
Spoon flour into measuring cups and level off; don’t scoop directly from bag Variations Add ¾ cup chocolate chips for chocolate peanut butter cookies
Use crunchy peanut butter or add ½ cup chopped peanuts for extra crunch
For keto version: use almond flour and sugar substitute Equipment Needed Electric mixer
Cookie scoop (1½ tablespoon size)
Parchment paper
Wire cooling rack